
Application of Stencils
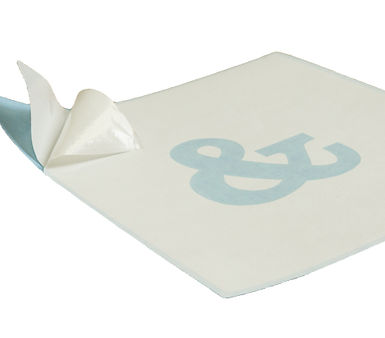
-Blue backing paper
-Stencil layer
-Application tape
Step 1: Align the Stencil on toy and mark. A grease pencil works well.
Step 2: Carefully remove the backing paper from the stencil layer and application tape, ensuring the stencil stays on the sticky tape on top.
Step 3: Align with marks on toy. Working slowing from one side to the other lay the stencil down.
Step 4: Smooth over the stencil with your hand, applying light pressure. If necessary, use a credit card wrapped in a washcloth to firming press and squeegee the stencil down firmly.
Step 5: Remove the application tape from on top of the stencil.
Step 6: Use light pressure to make certain stencil corners are all stick well.
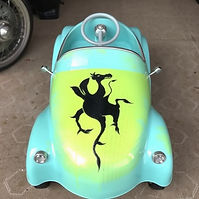
Step 7: Paint and remove stencil when finished.
Voila!
Take a picture and send it to Creative Graphics!